Identify images in sequence projects
Wildlife Insights gives you the option to create projects based on images or sequences. These are instructions for how to review and edit identifications in a sequence project. Read more about project types.
SKIP AHEAD TO
Review identifications
If you’ve created a Sequence project, Wildlife Insights will automatically group images into a sequence of images taken within 60 seconds of each other. This time is fixed and cannot be changed. Think of sequences as “independent” observations of animals. Images within a sequence are associated with the presence of one or more species. Individual images are not labeled; the sequence is. If a sequence contains a mixture of blank images and animals, the blanks are not included as a label. Blank sequences contain ONLY images of blanks. Sequences also have a Group size variable, which is the total number of animals captured by the sequence. By default, the group size is prepopulated with the maximum number of bounding boxes per image among all the images in the sequence (but it can be edited when needed). Sequence projects are much faster to review and catalogue since individual images are not labeled (in the downloaded images.csv, all images for a given sequence will be labeled the same). The number of images within a sequence will be displayed in a red circle in the top right-hand corner of the thumbnail preview.
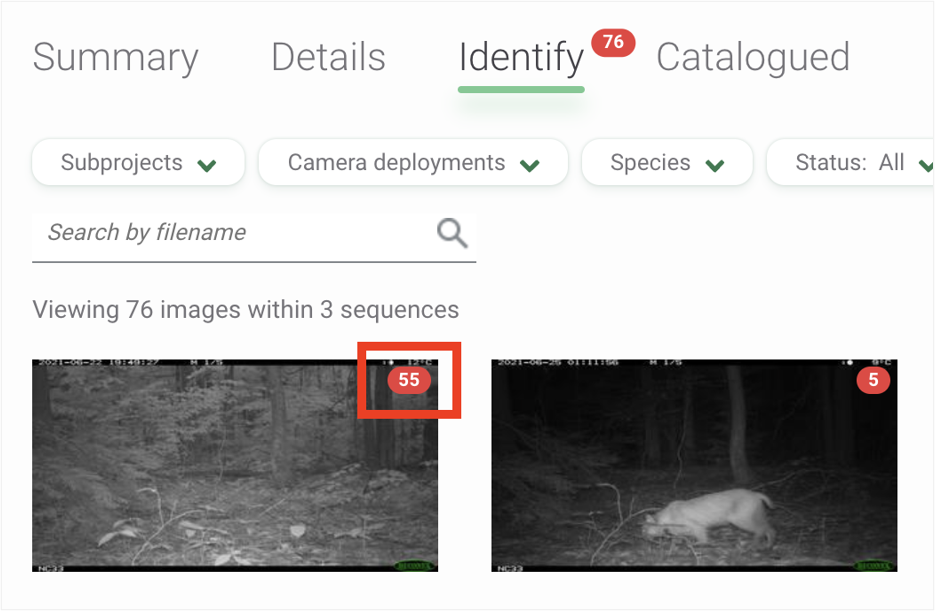
Click on a sequence group to view the images within that sequence.
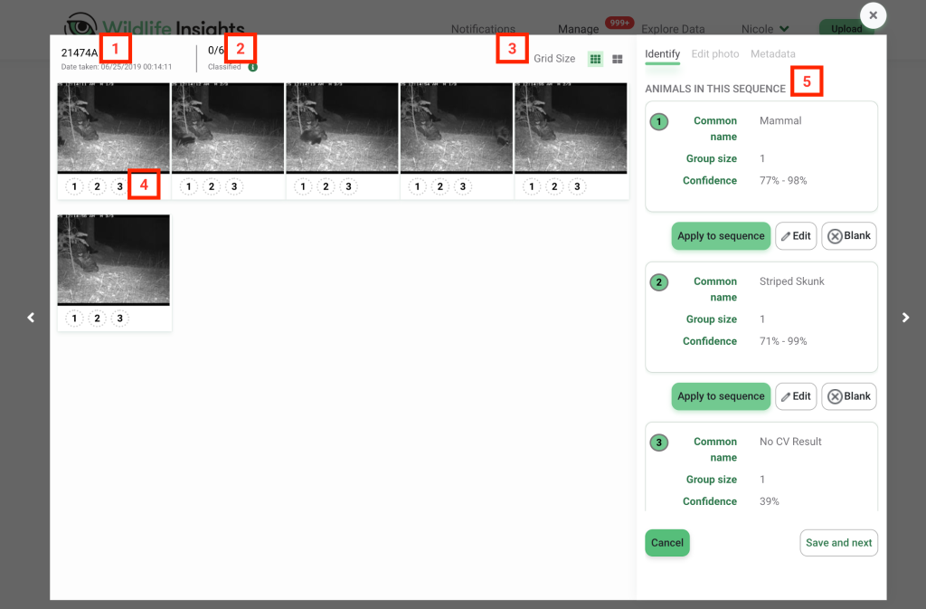
Once the sequence opens, you’ll see all of the images in the sequence in a small thumbnail preview. Let’s review the major components of this interface:
- The deployment name and timestamp of the first image
- The numerator shows the number of images that have a confirmed or edited identification. The denominator shows the total number of images in the sequence.
- Change the grid size from a small thumbnail to a medium thumbnail. You can also double-click on any image to view a large single image preview. Scroll to view more images in the thumbnail view.
- Tokens show the identification assigned to each image. A white token with a dotted outline indicates that the computer vision model has predicted an identification for that image, but the identification has not been confirmed by a user. Every image in a sequence is tagged with the same identification - you’ll see tokens for all identifications until you confirm at least one of the identification. A green token indicates an identification that has been confirmed by a user.
- You can see the full identification associated with a token by referring to the identification panel on the right side of the screen.
Approve or edit identifications
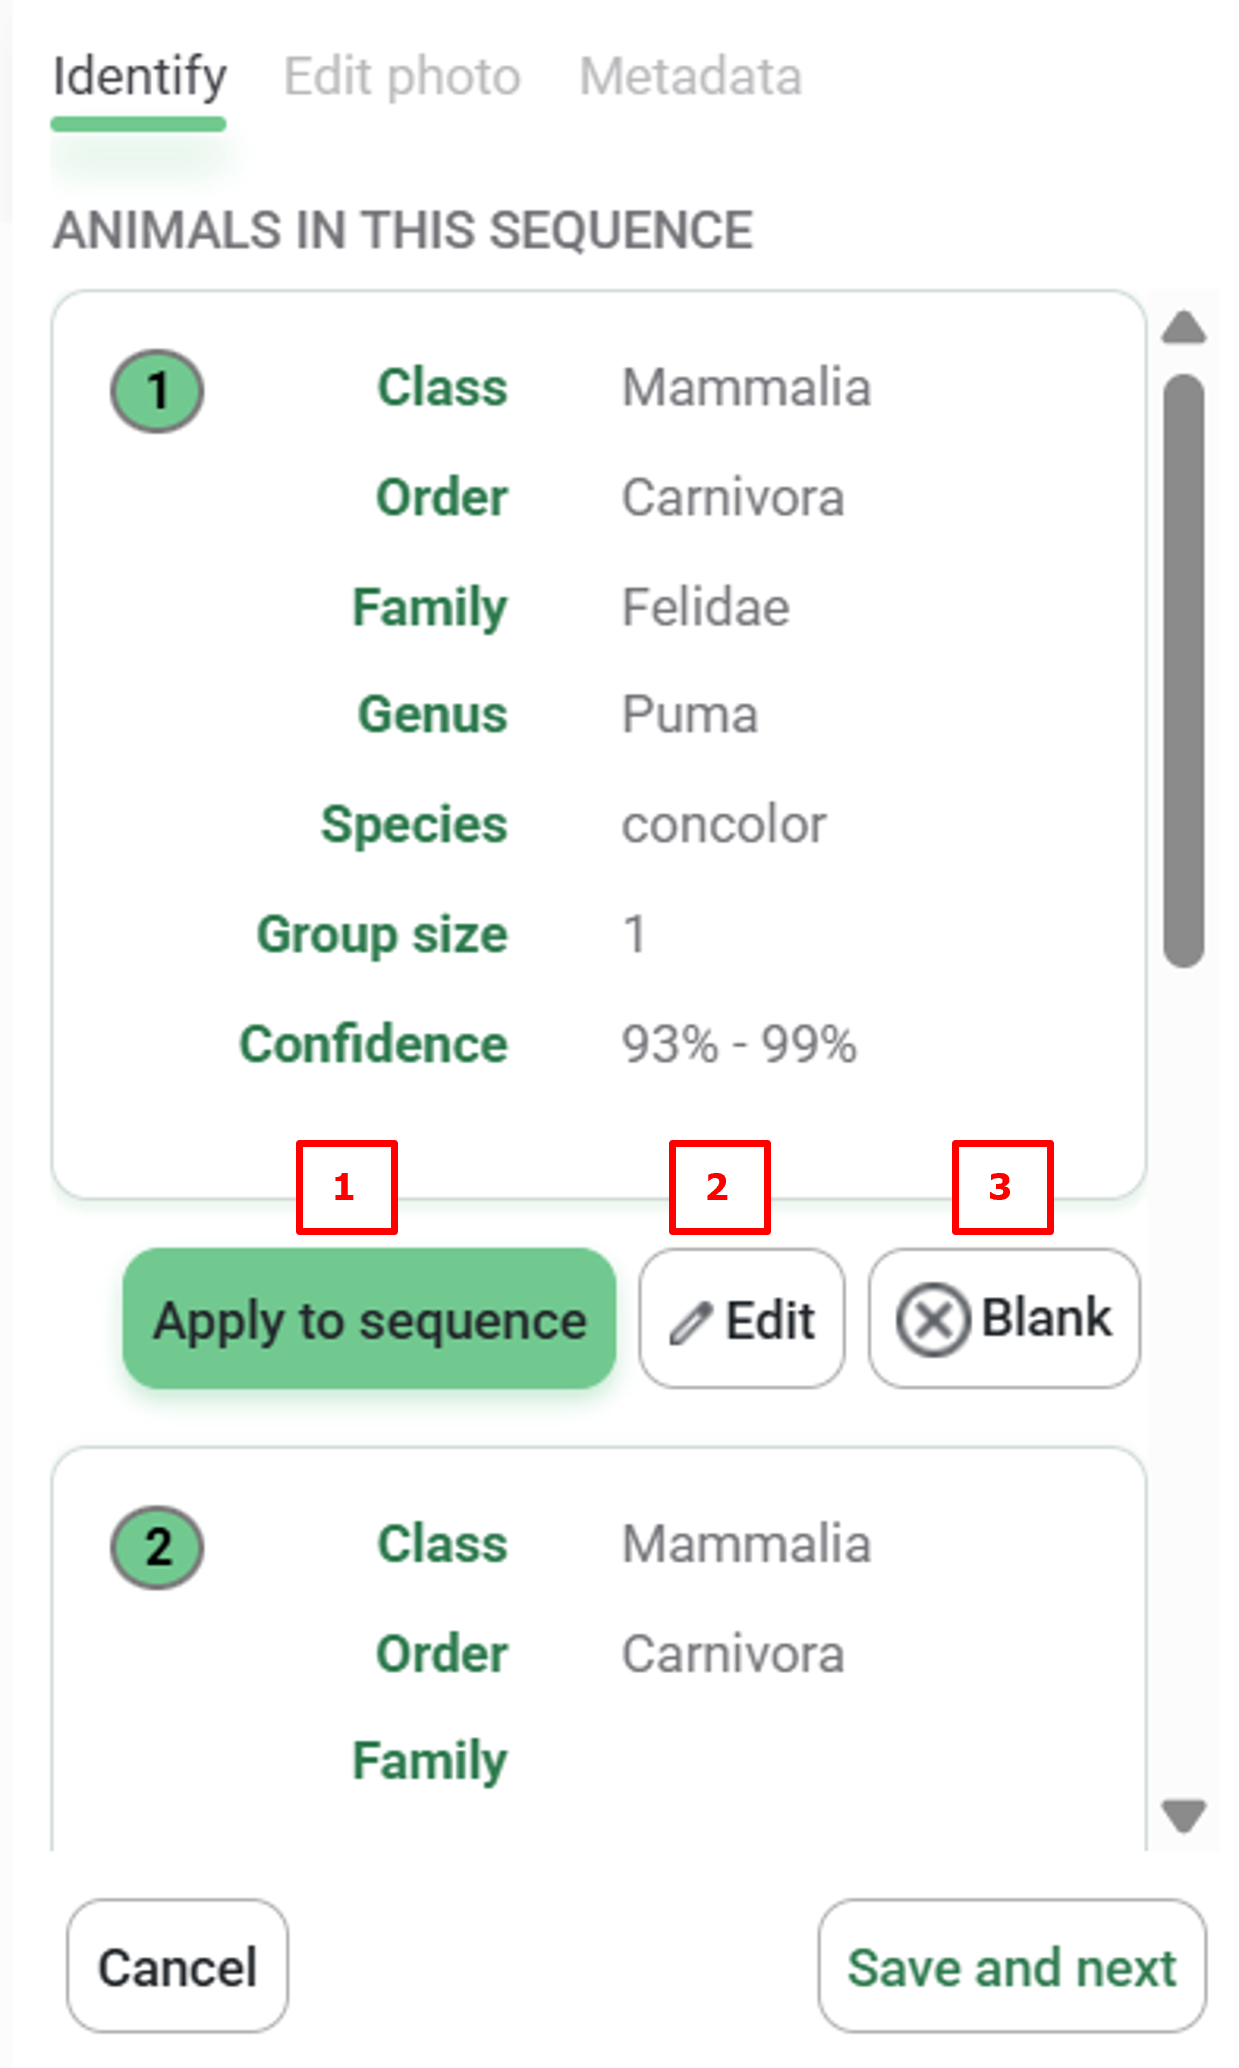
The buttons below any identification allow you to confirm or edit the identification associated with the sequence.
- Click the green Apply to sequence button to apply and confirm the identification for all images in the sequence. This will remove all other Computer Vision IDs associated with the sequence.
- Click Edit to edit an identification. If you edit an identification, the changes will be applied to all images in the sequence.
- Click Blank to mark the sequence as blank.
- Click Cancel to exit the sequence view. If this button is selected, no changes will be saved.
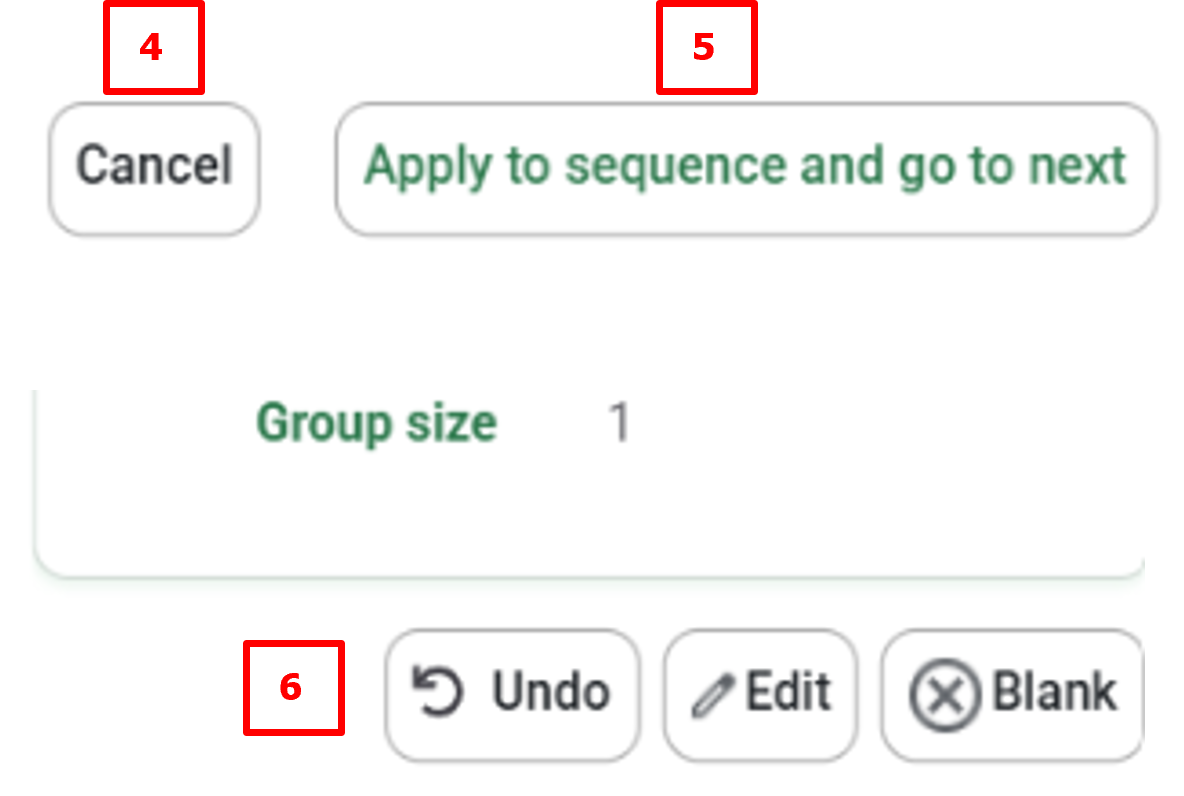
- Click Apply to sequence and go to the next step to move the entire sequence to the Catalogued tab. The next sequence will be opened automatically.
- Click Undo to undo the last identification.
Edit an existing identification
- Edit the identification by clicking Edit and modifying the identification or adding additional animals.
- Click Update images to save your edits and update the identification. Any changes will apply to all the images associated with the identification being edited.
- Click Cancel to return to the default burst view. You can also click the X to return to the default burst view.
Review progress
- As you confirm identification, you’ll see the numerator update in the Classified section.
- The confirmed identification will also show the number of images to which the identification has been applied.
- An identification confirmed by a user will be displayed as a green token.
- Click Save and next to move all the images in the sequence to the Catalogued page. The next sequence will open automatically.
 Back to the guide